
Jump to section
Can’t find the answer you’re looking for? Don’t worry we’re here to help!
Contact supportHow to Optimize Graphics Card Settings for AutoCAD and Revit
This document will guides you through configuring your computer to ensure high-performance CAD software like AutoCAD and Revit uses your dedicated graphics card instead of the integrated one.
This is crucial for optimal performance and stability.
Prerequisites
- A Windows PC with a dedicated graphics card (e.g., NVIDIA).
- AutoCAD or Revit installed on your system.
Step 1: Open Display Settings
AutoCAD and Revit require significant system resources.
By default, your computer might use the low-power integrated graphics card.
To change this, start by right-clicking anywhere on your desktop and selecting Display settings.

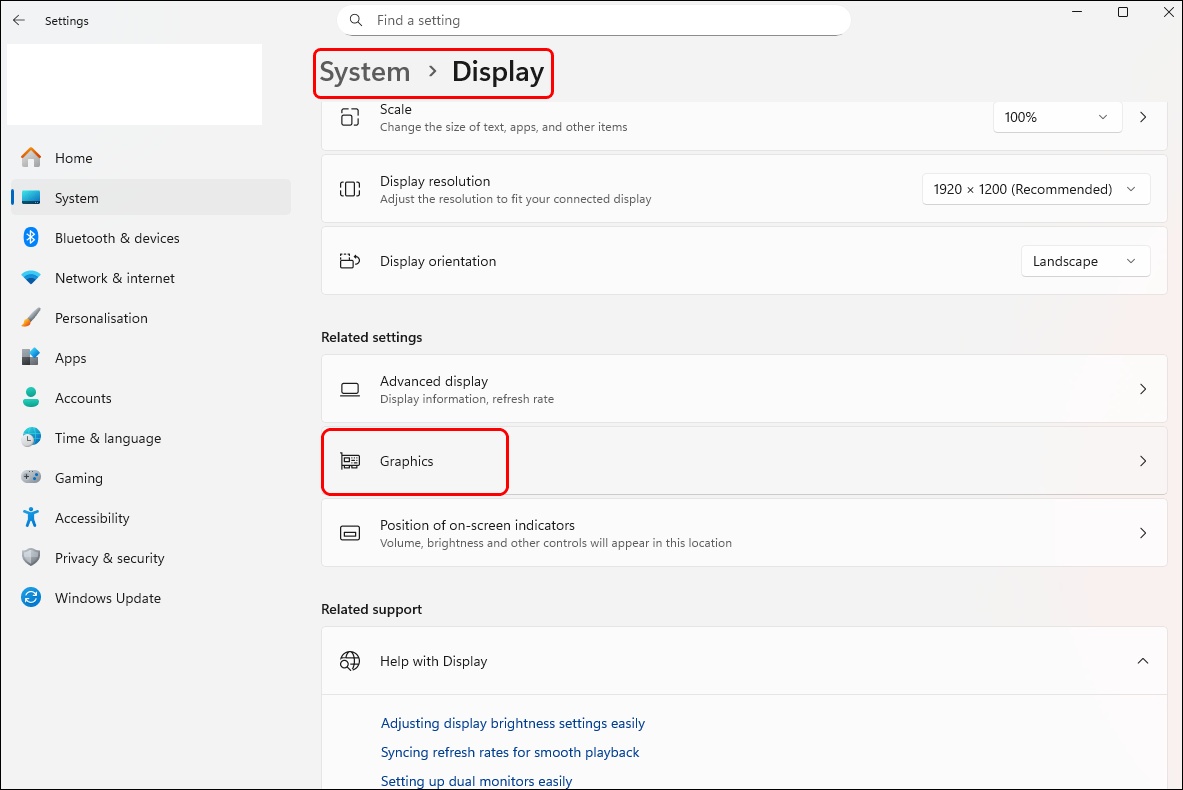
Step 2: Access Graphics Settings
In the System > Display menu, scroll down to the “Related settings” section and click on Graphics.
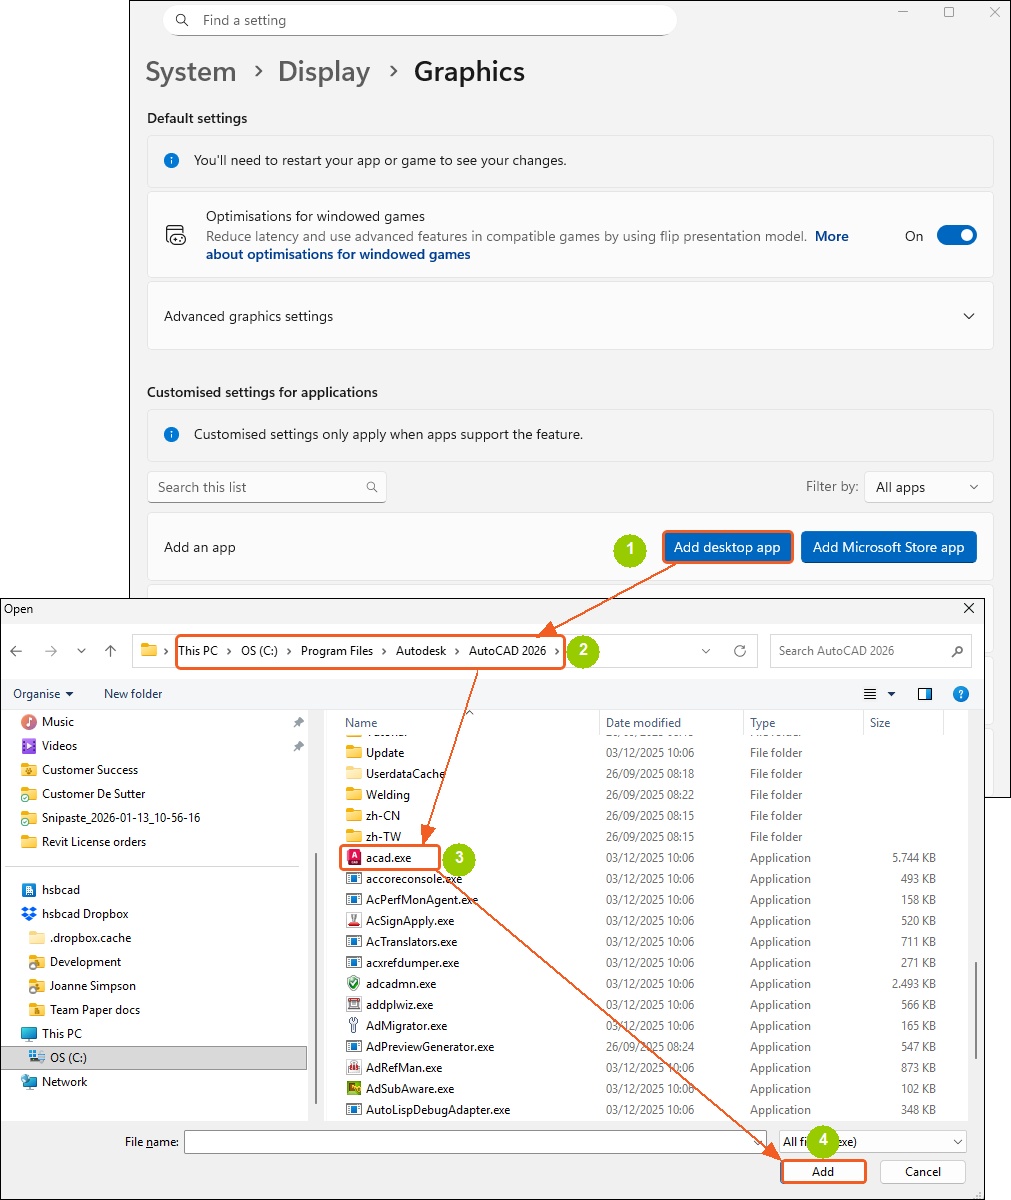
Step 3: Add Your CAD Application
You need to ensure your specific application is listed. If you don’t see AutoCAD or Revit in the list, click the Browse button (or “Add desktop app”). Navigate to the installation folder (usually in C:\ProgramFiles\Autodesk\AutoCAD 20xx) and select the executable file (e.g., acad.exe).
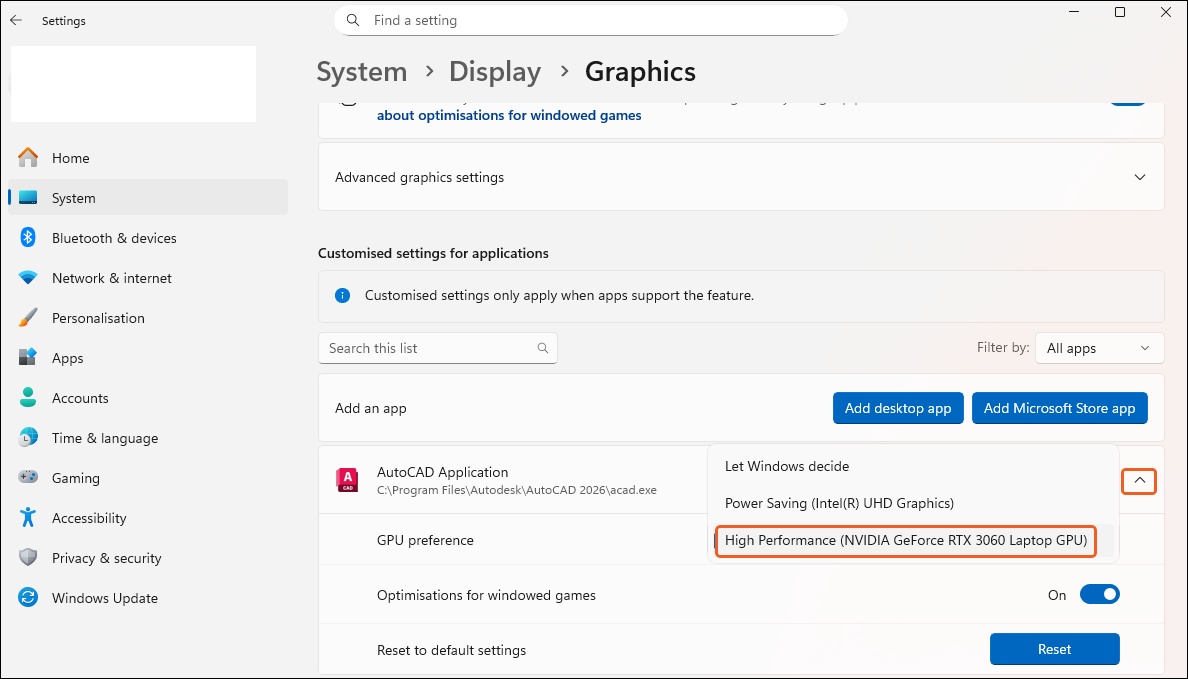
Step 4: Set the High Performance Preference
Once the application has been added to the list, click it to expand the options.
Select High Performance (your dedicated NVIDIA GPU should be listed here) and click Save.
Repeat this process for Revit if necessary.
Step 5: Open NVIDIA Control Panel
For users with NVIDIA cards, it is also recommended to configure settings directly in the driver software.
Right-click on your desktop, select Show more options, and then select NVIDIA Control Panel.
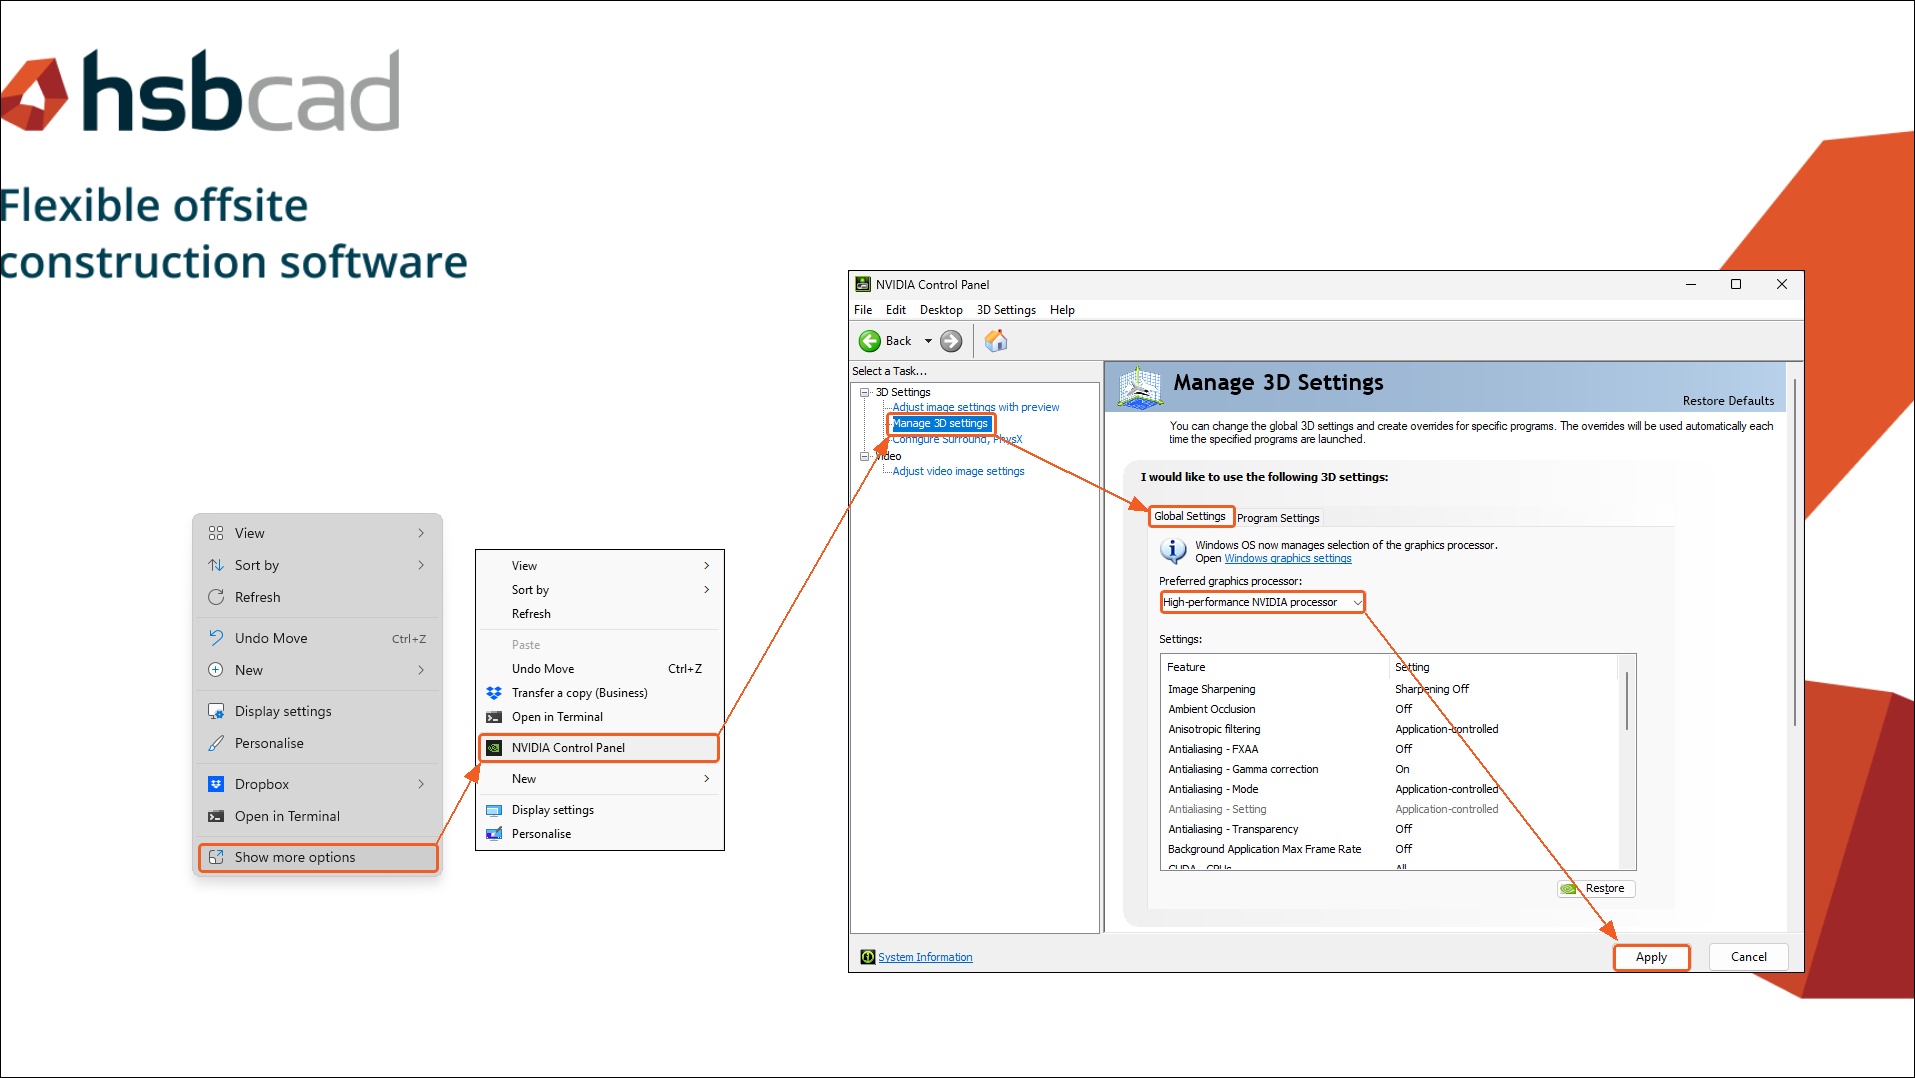
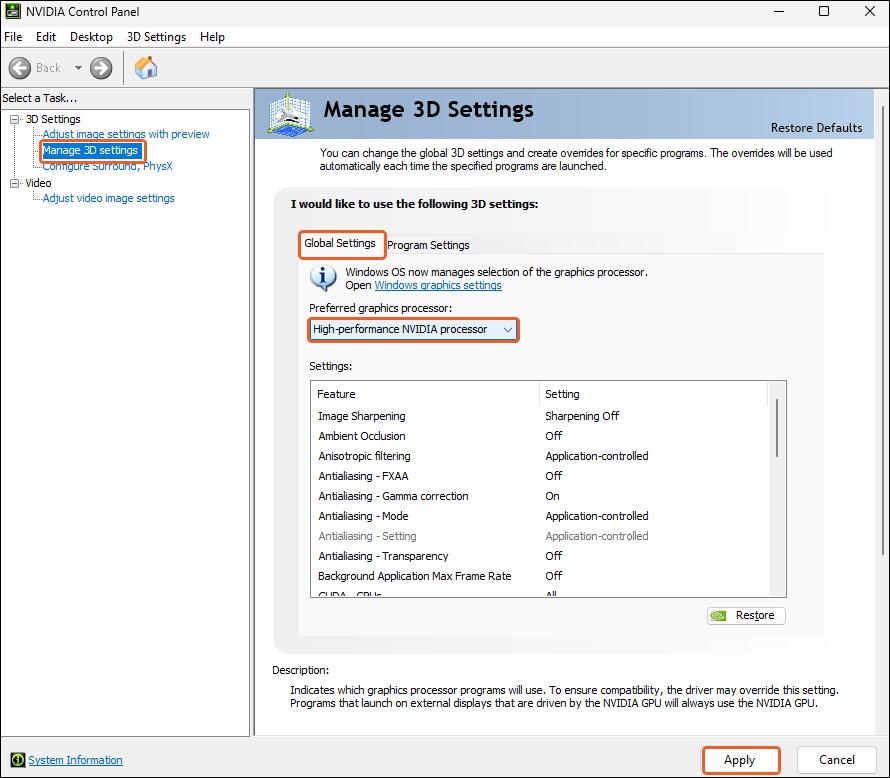
Step 6: Configure Global 3D Settings
In the NVIDIA Control Panel, navigate to Manage 3D settings on the left.
Under the Global Settings tab, locate the “Preferred graphics processor” dropdown menu.
Change this from “Auto-select” to High-performance NVIDIA processor.
Select Apply to save changes.
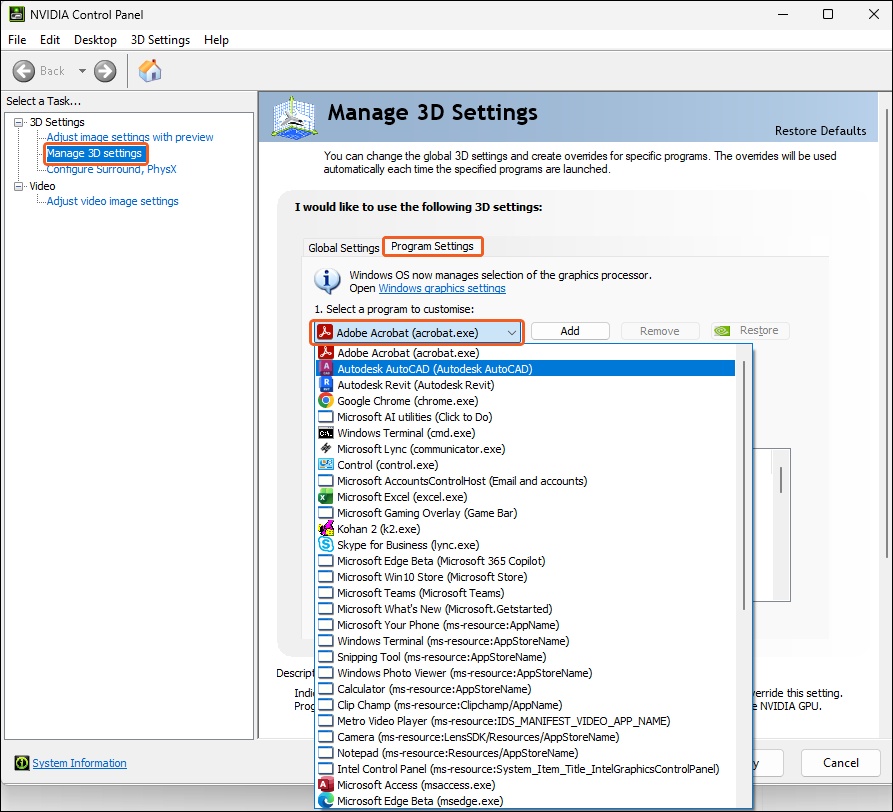
Step 7: Configure Program Specific Settings
Switch to the Program Settings tab next to Global Settings.
Select your CAD program (AutoCAD or Revit) from the dropdown list.
If it’s not there, click Add to find it.
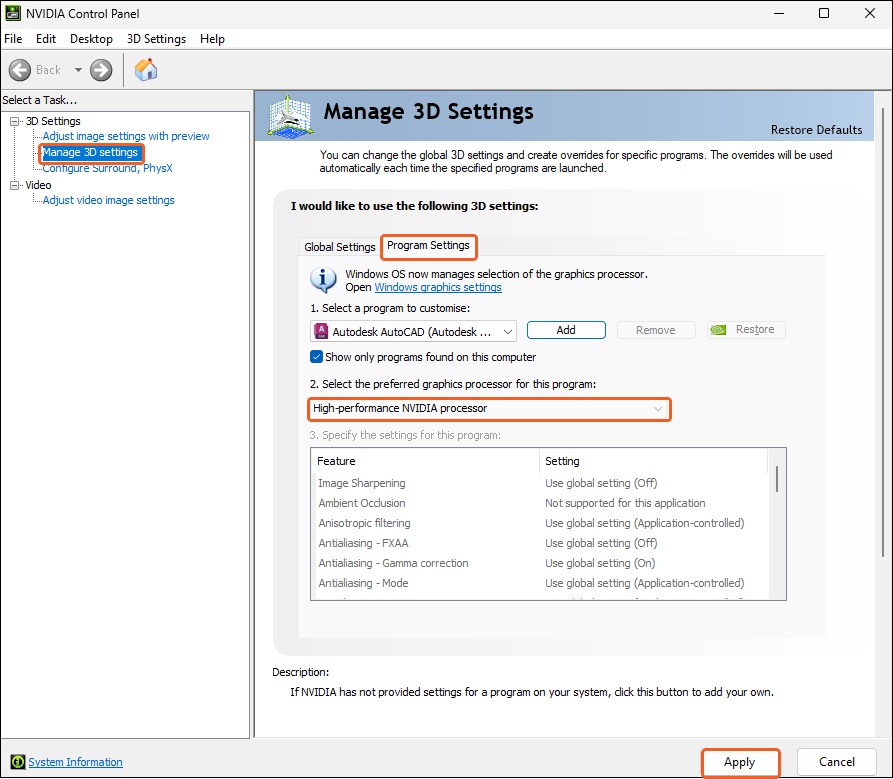
Under Select the preferred graphics processor for this program” , choose High-performance NVIDIA processor.
This forces the specific application to always use the powerful GPU.
Select Apply to save changes.
Troubleshooting / FAQ
Q: I don’t see the NVIDIA Control Panel option.
A: Ensure your graphics drivers are up to date.
You can download the latest drivers from the NVIDIA website or use GeForce Experience.
Summary
You have successfully configured Windows and your graphics driver to prioritize your dedicated GPU for AutoCAD and Revit.
This should result in smoother performance and better handling of complex 3D models.