
Jump to section


Can’t find the answer you’re looking for? Don’t worry we’re here to help!
Contact supportTSL | hsbEntityTag
This document will explain how to use the hsbEntityTag tsl
1. Accessing hsbEntityTag
You can launch the tool in hsbDesign for AutoCAD Architecture using either of the following methods:
- Ribbon Path: Go to the hsbInOutput tab -> Shop Drawings panel -> click the Tagging drop-down -> select EntityTag.
- Command Line: Type
HSBENTITYTAGand press Enter.

2. Dialogue Box Settings
When you open the tool, the hsbEntityTag dialog box will appear with the following configuration options:
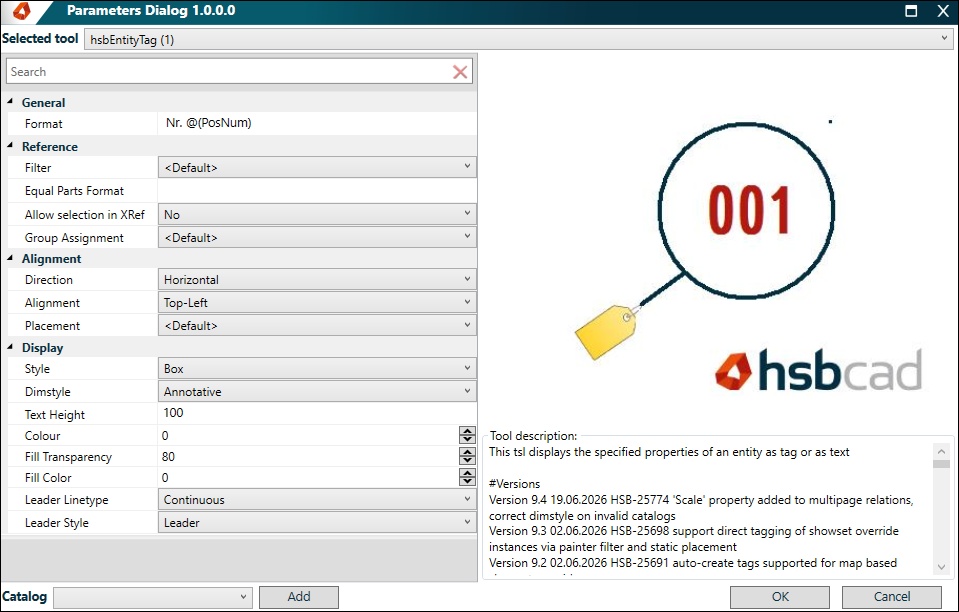
General
- Format: Enter the properties you want to display on the tag. Type
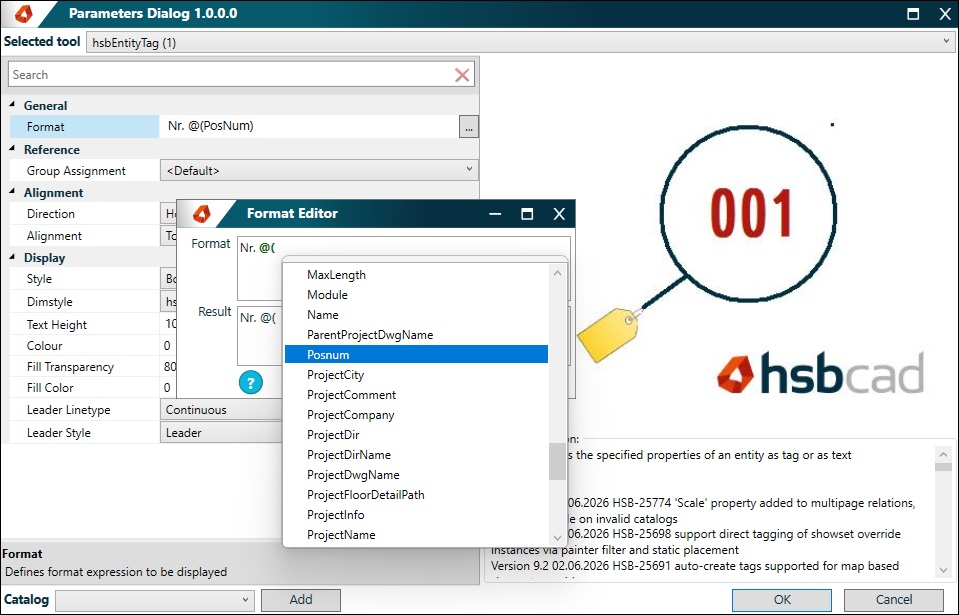
@(to open a drop-down list of available properties associated with the target entity. Selecting a property previews its output value in the Result field.
Note: The format selector dropdown is not active when opening the dialog for the first time because no target entity has been selected yet. Once a tag is placed, clicking or editing it links it to the entity, enabling the full property list.
Reference Settings
- Filter: Defines a filter for object reference, such as a painter definition (default is the selected object).
- Allow Selection in XRef: Determines whether you can select and tag entities nested inside block references or external references (XRefs).
- Group Assignment: Specifies the layer to assign the tag instance. Setting this to
<Default>assigns it by entity alignment. - Direction: Controls the display direction of the tag.
- Alignment: Defines the grip point (insertion/anchor point) position for the tag.
- Placement: Determines how the tag is positioned relative to the selected object.
Display Settings
- Style: Choose how the tag boundary is drawn. Supported styles include Text (no border), Box, and Triangle.
- Dimstyle: Selects the AutoCAD dimension style to control the text font and standard properties.
- Text Height: Controls the physical size of the tag text.
- Colour: Sets the display color of the tag.
- Fill Transparency: Adjusts the transparency level of the tag background fill.
- Leader Line Type / Leader Style: Controls the line type and visual style of the leader line connecting the tag to the object.
3. Placement Workflow
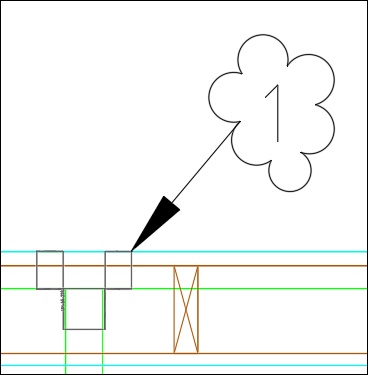
- Configure your desired tag properties in the hsbEntityTag dialog box and click OK.
- When prompted on the command line, select the target entity (such as a hanger or beam) that requires the tag.
- Click in the drawing space to place the tag.
4. Best Practices & Editing Tags
- Avoid Standalone Properties: Do not use a standalone property like
@(PosNum)as the entire format. If the property value is empty or fails to resolve, the entire tag will disappear. Instead, include descriptive static text prefixing the property, such asNr. @(PosNum). This ensures that even if the property is unresolved, the prefix text remains visible as a placeholder. - Editing Existing Tags: To modify or explore available formats for a placed tag, simply double-click the tag in the drawing. Since the tag is now linked to a specific entity, typing
@(in the format field will display only the properties supported by that specific object type.
5. Displaying the hsbEntityTag TSL in hsbClient/hsbView
To display the newer hsbEntityTag annotations directly in the hsbMake Client, follow a similar setup process:
- Open Client Settings: Open the Client Application Settings dialog box in the hsbMake Client.
- Select TSL Instances: In the left-hand navigation pane, select Tsl Instances.
- Create a New Configuration: Click the Add icon to create a new entry and name it descriptively (e.g., "Entity Tags").
- Configure Criteria: Go to the Criteria tab and configure the following fields:
- TSL Name: Enter
hsbEntityTagto match the tagging tool. - Zone (Optional): Define a zone if you wish to limit the tags to specific areas of your element views.
- TSL Name: Enter
- Configure Display (Optional): On the Display tab, you can customize:
- Show Label: Enable this checkbox to display the tag's text content.
- Label Format: Set this field to control what information is displayed (e.g., using Model Data Formatting or plain text).
- Verify and Save: Click OK to apply and save your settings. The
hsbEntityTagtext will now render dynamically on your elements in the client view.
(Insert placeholder for UI configuration screenshot here)
Verification
Once both TSL configurations are active, open or refresh an element in the ElementView client. You should see the physical hangers and their corresponding tags rendered in the drawing area exactly as configured.